Chapter 4 Working with an XML model


Creating a mapping for an XML object

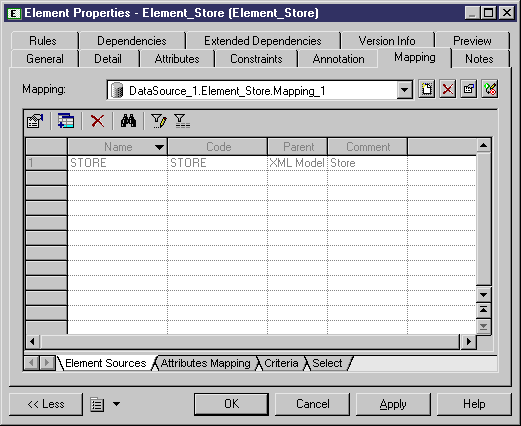
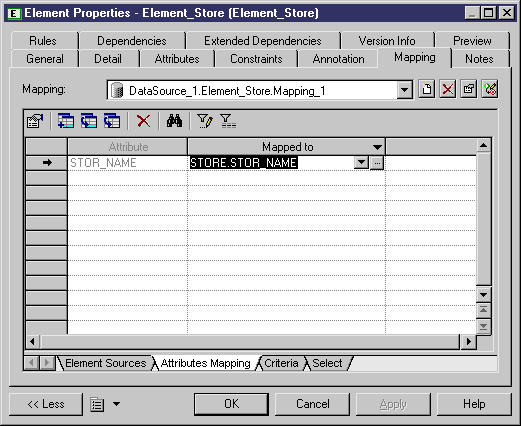
Here we choose to map an element to PDM tables, but the same procedure applies for other XML objects.

Steps To create a mapping for an element:

  1. Double-click an element to display its property sheet, then click the Mapping tab.
  2. Click the Create Mapping tool beside the Mapping list to create a mapping for the current element. If several data sources are available, you have to select one or several data sources in the selection list and click OK.

    WARNING! 

    Caution
    You cannot create a mapping for an XML object if you have not previously defined a data source containing at least one source model.
    To define a data source, see section Defining data sources in an XML model.


  3. In the Element Sources sub-tab, click the Add Objects tool to select the source tables you want to map to the current element and click OK.

    The name and code of the tables appear in the list.
  4. Click the Attributes Mapping sub-tab and click the Add Mapping tool in the toolbar.

    Note   Create From Sources and Generate Mapping tools
    Click the Create From Sources tool to automatically create attributes from the columns selected in the data source.
    Click the Generate Mapping tool to automatically create the mapping between columns and attributes with identical name or code in the data source and the current model

  5. Select the attributes that will be mapped to columns in the source tables and click OK.

    The selected attributes appear in the Attribute column of the list.
  6. Click the down arrow in the "Mapped to" column to select the column in the data source table to which the selected attribute will be mapped.
  7. Click the Criteria sub-tab if you want to specify join criteria between the source tables or views.
  8. Click the Select sub-tab if you want to visualize or modify the entire statement.
  9. Click OK.


Copyright (C) 2005. Sybase Inc. All rights reserved.