
Chapter 2 XML Model Basics
Creating an XML model using the New model option
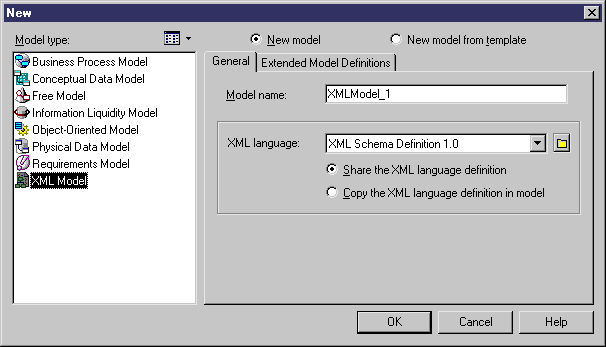
When you create a new XML model using the New model option, you have to select an XML language.
You can then select one of the following options:
| Option
|
Description
|
|---|
| Share
|
To use the shared XML language stored in the XML Languages directory of your installation. Any changes made to the XML language are available to the linked XML model
|
| Copy
|
To create a copy of the XML language in the model. The current XML language is independent from the original XML language, so any changes made in the XML language are not available to the other models. The XML language is saved with the model and cannot be used by other models
|
 To create a new XML model using the New model option:
- Select File→New to display the New dialog box.
- Select XML Model in the list of model types.
- Select the New model radio button in the upper right part of the dialog box.

- Type a model name in the Model name box. The code of the model, which may be used for script or code generation, is derived from this name according to the model naming conventions.
- Select an XML language from the XML language dropdown listbox of the General page.
- Select either Share or Copy.
- <optional> If you want to attach one or more extended model definitions to the model, click the Extended Model Definitions tab, and select the extended model definitions of your choice.
For more information on attaching extended model definitions to a model, see section Selecting extended model definitions at model creation.
- Click OK.
A new XML model is created in the Workspace.
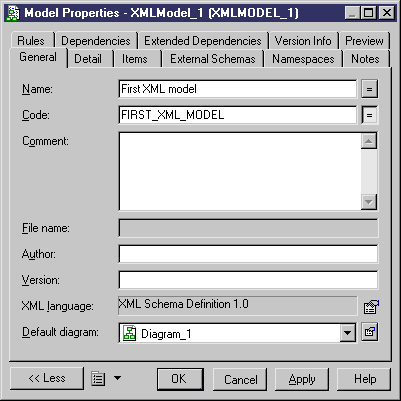
- Select Model→Model Properties.
or
Right-click any empty space in the diagram window and select Properties from the contextual menu.
The model property sheet appears.
- Modify the name and code of the model.

- Click OK.
|
Copyright (C) 2005. Sybase Inc. All rights reserved.
|

|


![]() To create a new XML model using the New model option:
To create a new XML model using the New model option:

