![]()
![]()
Chapter 8 Managing document versions in the repository
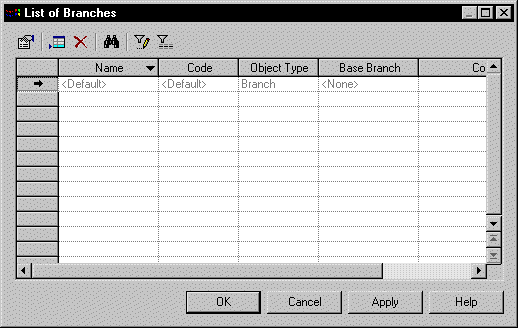
When you connect for the first time to the repository, the <Default> branch is automatically created. This branch is like the trunk of the version tree. You can create branches using the <Default> branch as a base branch.
Users with the Manage Branches right can create branches in the repository. Usually, the user allowed to create branches in a project is the team leader.
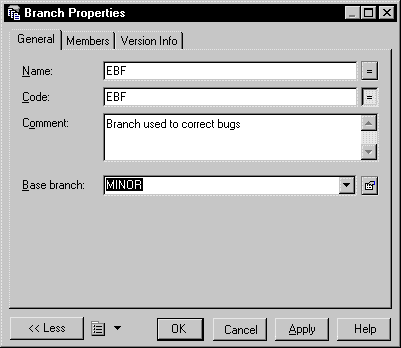
When you create a branch, you have to define the following properties:
| Property | Description |
|---|---|
| Name | The name of the item which should be clear and meaningful, and should convey the item's purpose to non-technical users |
| Code | The technical name of the item used for generating code or scripts, which may be abbreviated, and should not generally include spaces |
| Comment | Additional information about the branch |
| Base branch | Name of the branch from which the current branch is created. You can define a base branch or select <None> in this case the new branch does not have a base branch |
![]() To create a branch:
To create a branch:
| Copyright (C) 2005. Sybase Inc. All rights reserved. |
| |