
Chapter 7 Working with Eclipse
Activating synchronization
From the Model Explorer
You can activate the synchronization of an OOM from the Model Explorer.
 To activate synchronization from the Model Explorer:
- In the Model Explorer, right-click the model item and select Synchronize.
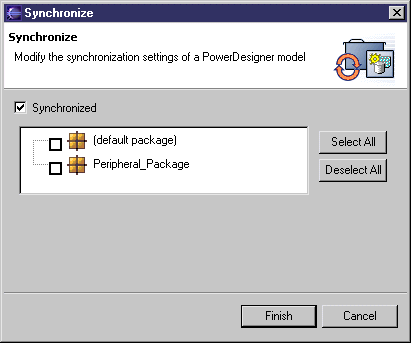
The Synchronize dialog box is displayed.
- Select the Synchronized check box to activate the group box and select the packages you want to be synchronized with their source code. The default package regroups all the objects at the root of the model.

- Click Finish.
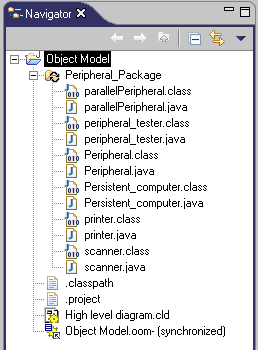
A Java file (.java) and a compiled file (.class) appear for each object in the synchronized packages of the Navigator.

If you double-click a Java or a compiled file, its source code is displayed in the Editor area.
Note the synchronized symbol on the package icon...

...and the (synchronized) mention beside the model resource.
From the Navigator
You can activate the synchronization of an OOM from the Navigator.
 To activate synchronization from the Navigator:
- In the Navigator, right-click the resource item with the model extension and select Properties.
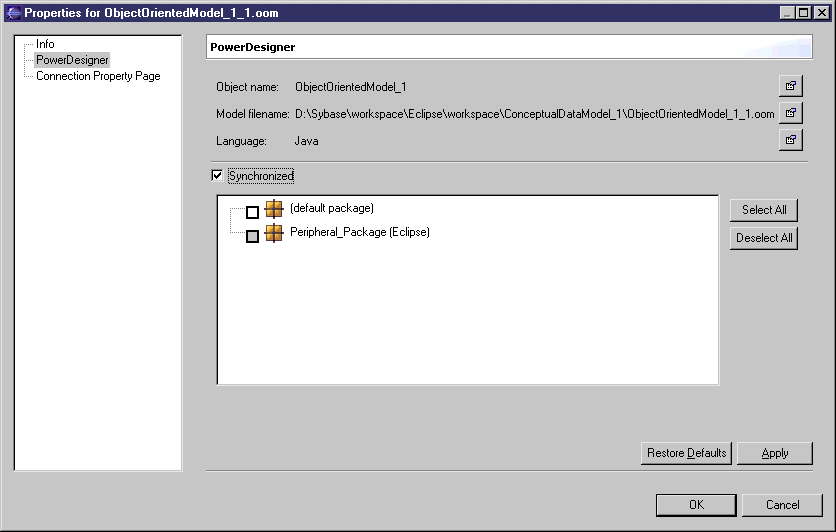
The model properties dialog box is displayed.
- Select PowerDesigner in the left pane and the Synchronized check box in the PowerDesigner page.

- In the Synchronized group box, select the packages you want to be synchronized with their source code. The default package regroups all the objects at the root of the model.
- Click OK.
A Java file (.java) and a compiled file (.class) appear for each object in the synchronized packages of the Navigator.
If you double-click a Java or a compiled file, its source code is displayed in the Editor.
|
Copyright (C) 2005. Sybase Inc. All rights reserved.
|

|


![]() To activate synchronization from the Model Explorer:
To activate synchronization from the Model Explorer:


![]() To activate synchronization from the Navigator:
To activate synchronization from the Navigator:
