

Chapter 4 Managing Profiles
Getting started with forms
This section is a step by step guide to creating forms for presenting extended attributes in a PDM for Teradata V2R5. Note: This is just an example, extended attributes are already organized in different forms in the Teradata DBMS delivered with PowerDesigner.
Analyze existing extended attributes
Create a new PDM for Teradata V2R5 and select Database→Edit Current DBMS.
Expand the Profile and the User folders, in the User folder, double-click the Extended Attributes folder to display its content. You can see that the user object has quite a few extended attributes.
These extended attributes could be organized and presented in a specific tab. You could even display the most commonly used attributes in one tab and create an additional dialog box that would be called for editing more specific attributes.
Create a property tab for common extended attributes
- Right-click the User metaclass in the resource editor and select New→Form.
- Type Teradata in the Name box, and type a comment in the Comment box. Make sure the Property tab type is selected and clear the Add to favorite tabs check box.
- Click the Add Extended Attribute Control tool in the palette and select the following attributes:
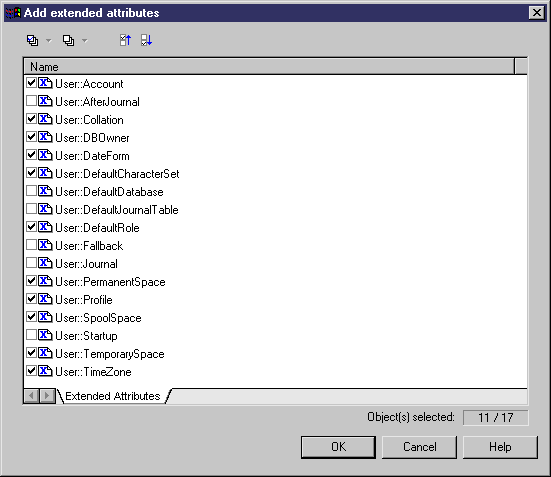
- Click OK. Extended attributes are added to the form. You can now organize extended attributes logically using group boxes.
- Click the Add Group Box tool, a group box item is added at the end of the tree. You can name it Space.
- Create 2 additional group boxes and name them Regional Settings and User Profile.
- Drag each extended attribute into its corresponding group box.
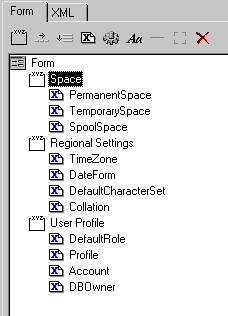
- Click the Preview button to see the new tab. You can see that the different input boxes are not aligned. Click Cancel to close the preview box.
- Select each group box and type 140 in the Label Space box in order to align attribute input boxes in the property tab.
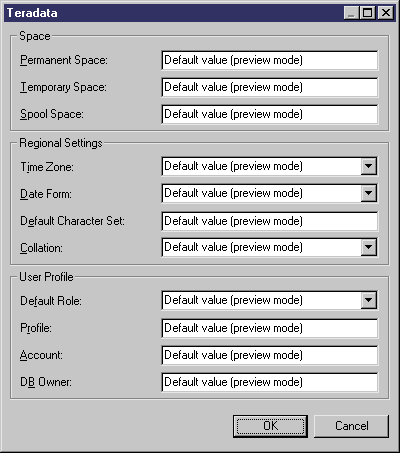
You are now going to create a dialog box for typing values for more specific extended attributes. This dialog box will be called from a push button in the new Teradata tab you have just created.
Create a dialog box for specific extended attributes
- Right-click the Forms category in the User metaclass and select New to create a new form.
- Type Advanced Teradata Attributes in the Name box and type a comment in the Comment box.
- Select Dialog Box in the type list.
- Click the Add Extended Attribute Control tool in the palette, select the attributes that you did not include into the Teradata tab, and click OK.
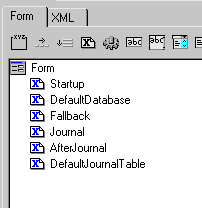
You can create a group box called Journal to logically gather Journal, AfterJournal and DefaultJournalTable extended attributes.
- Click the Add Group Box tool to create a group box item and name it Journal.
- Drag Journal, AfterJournal and DefaultJournalTable extended attributes under the group box item in the tree.
- Click the Form root folder in the tree and type 140 in the Label Space box to make sure all input boxes are aligned in the new dialog box. Click Preview.
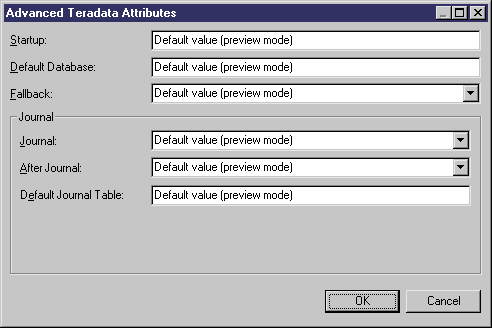
The Advanced Teradata Attributes dialog box is called from a button in the Teradata tab. Now you need to create the mechanism for calling a dialog box from a property tab.
Call a dialog box from a property tab
When you call a dialog box you invoke a method. You need to create the method that will display the selected dialog box and then add this method to the property tab to create a button for calling the dialog box.
For more information, see the "Defining Methods in a Profile" section.
- Right-click the User metaclass in the resource editor and select New→Method.
- Name the method ShowAdvancedExtendedAttributes and click the Method Script tab to type the method script.
- Type the following script:
Sub %Method%(obj)
   ' Show custom dialog for extended attributes advanced edition
   Dim dlg
   Set dlg = obj.CreateCustomDialog("TERADATA.Advanced Teradata Attributes")
   If not dlg is Nothing Then
      dlg.ShowDialog()
   End If
End Sub
- Click Apply to validate method creation.
- Select the Teradata property tab in the Form folder in the User metaclass and click the Add Method Push Button tool. The selection dialog box displays the method you have just created.
- Select the method and click OK, the method appears in the form tree view.
- Type Advanced... in the Label box to give a clear name to the button and click Preview to see the result in the property tab:
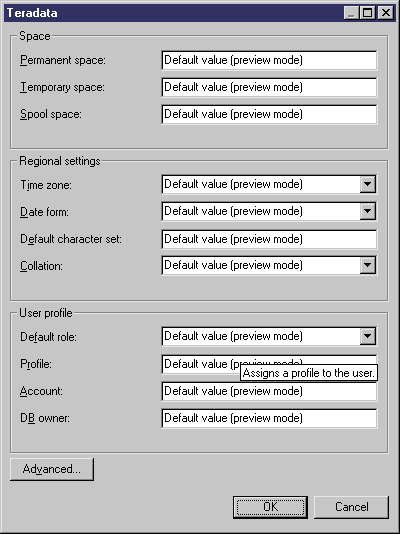
You cannot test the dialog box invocation from the preview mode so you need to close the resource editor, create a user and display its property sheet to see the new property tab and the advanced dialog box:
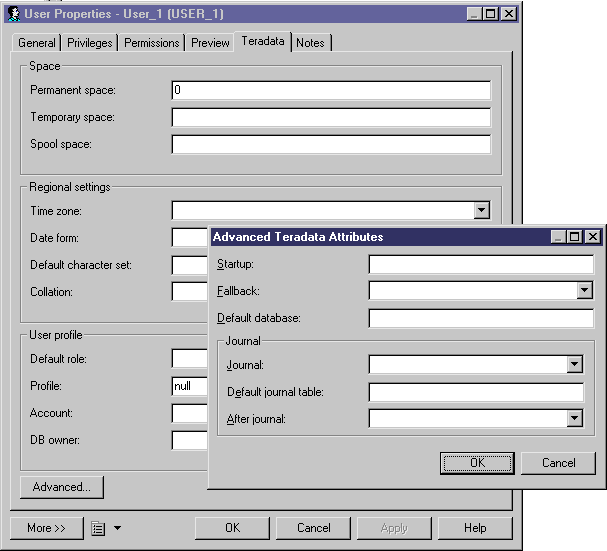
|
Copyright (C) 2005. Sybase Inc. All rights reserved.
|

|


