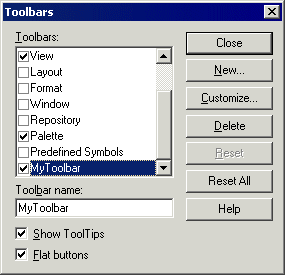
You can customize the PowerDesigner toolbars according to your needs.
- Select to display the Toolbars dialog box, and select a toolbar in the list.
- Select whether you want to Show Tooltips and have Flat buttons (instead of the standard 3D buttons).
- Click the Customize button to open the Customize Toolbars window.
-
Select a menu category in the Categories pane to display the corresponding tools in the right pane.
Select the Custom Graphical Tools category to view and add tools defined in an extension (see Chapter 3, Extending Your Models with Profiles in Customizing and Extending PowerDesigner ).
- Select the tool you want to add and drag and drop it onto the desired toolbar.
-
Click Close to return to the Toolbars dialog.
Click Reset or Reset All to undo your customizations.
- Click OK to return to your model.
