You can create new toolbars in the PowerDesigner environment.
- Select Tools > Customize Toolbars to display the Toolbars dialog box.
- Click the New button to display the New Toolbar dialog box.
-
Type a name in the Toolbar Name box.
-
Click OK.
The new toolbar is displayed in the list of toolbars, it is empty.
-
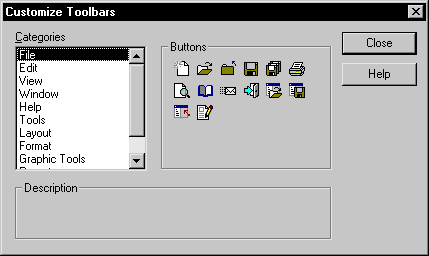
Select the new toolbar in the Toolbars list and click Customize to display the Customize Toolbars dialog box.
-
Select a menu category in the Categories pane.
The tools corresponding to the commands of the menu appear in the right pane of the window with a description in the lower part of the window.
-
Select the tools you want to add, drag them to the new toolbar, and release the mouse button.
The tools are inserted into the new toolbar.
Note:To delete a tool in a toolbar, you must be in Customize mode, then right-click the tool to be deleted and select Delete from the contextual menu.
- Click Close in each of the dialog boxes.


