You can search for PowerDesigner model objects in the PowerDesigner Portal by clicking the Search tab. You cannot search external application documents. You must have at least the Read permission to find objects.
-
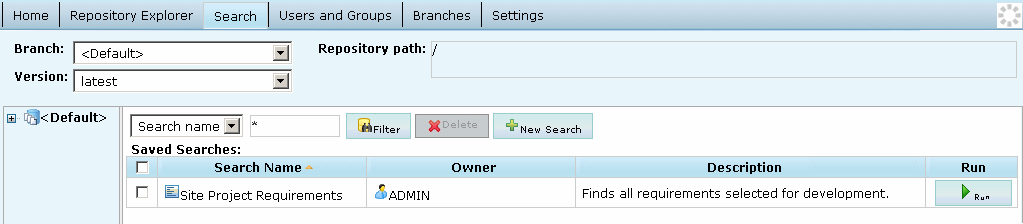
Click the Search tab to access the Search screen:
- Select a saved search from the list and click the Run button or click the New Search button to create a new search.
-
[optional] Select a branch, model (by clicking it in the Explorer), and model version at the top of the screen to restrict your search. By default, you search the entire repository.
Note:
Searching the entire repository may take a long time. You should, wherever possible, try to restrict the scope of your search.
In this example I select to search version 4 of the Project Management (PDM):
-
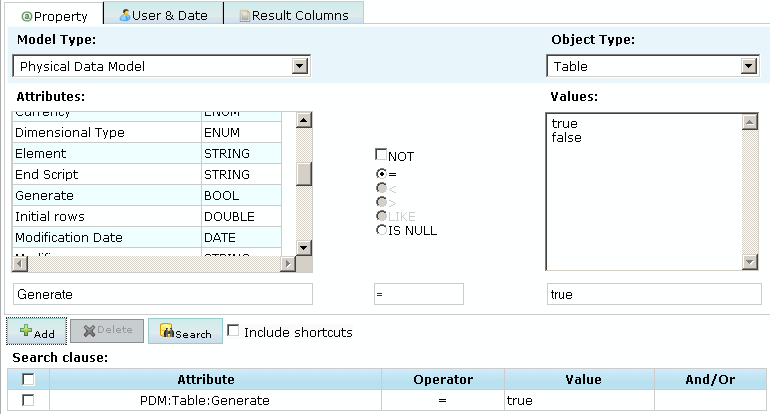
[optional] Select a model type and an object type to search. By default, you search all model types and all object types.
In this example, I select Physical Data Model Table:
- Select a property, operator and value to search against. Depending on the property that you select, the choice of operator may be restricted and/or values may be suggested. Note that the case sensitivity of your searches depends on your DBMS.
-
Click the Add button to add the complete search clause to the Search clause table.
In this example, I choose to search for tables that are selected for generation:
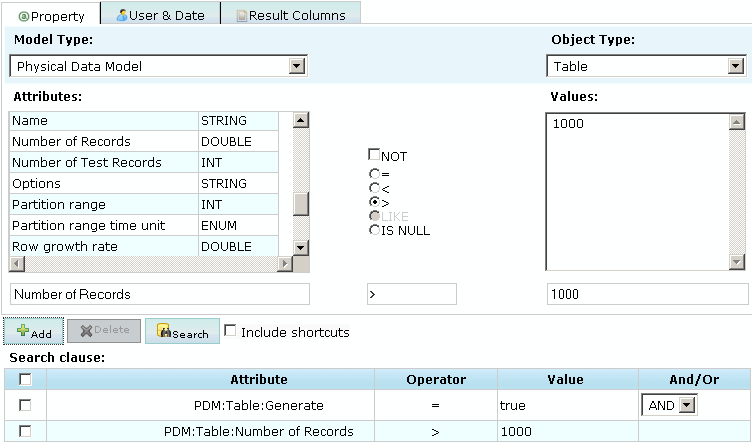
- [optional] Create additional search clauses and add them to the Search clause table, choosing one of the following conjunctions:
- [optional] Click the User & Date tab and specify additional search clauses based on user names and creation and modification dates.
- [optional] Click the Result Columns tab and select the columns that you want to display on the result page. By default, only the object type and name are shown.
- [optional] Select the Include Shortcuts check box to include shortcuts to objects in your search results.
-
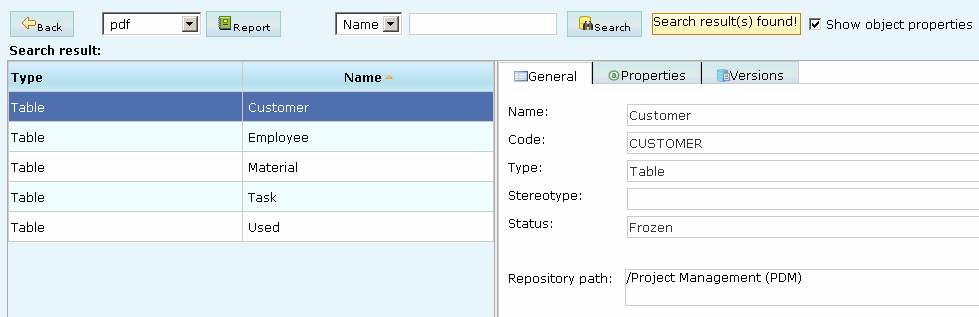
Click the Search button to start your search.
Your search results are displayed. Click on an object to display all its available properties.
In my example, my search returns five tables that meet my criteria:
-
[optional] After performing a search, you can:
-
Select either pdf or xls and click the Report button to generate an Excel or PDF version of your results.
- Toggle between displaying and hiding all the properties of the selected object with the Show object properties option.
-
Select an attribute, enter a value in the search box at the top of the screen and click the Search button to search within your results.
-
Click the Back button and:
-
Modify your search string.
-
Enter a Saved search name and description and then click the Save button to make your search available for reuse on the Search page.
-
-