PowerDesigner supports the generation of the process language files.
|
Process language |
What is generated |
|---|---|
|
Analysis |
No files generated as this language is used for modeling purposes only |
|
BPMN 1.0 |
No files generated as this language is used for modeling purposes only |
|
ebXML BPSS v 1.01 ebXML BPSS v1.04 |
.XML files |
|
BPEL4WS 1.1 WS-BPEL 2.0 |
.XML files .WSDL files |
|
Sybase WorkSpace Business Process 2.x |
.XML files .XSD svc_xyz (service files) |
|
Service Oriented Architecture |
No files generated as this language is used to design the orchestration of processes without being linked to any particular platform or orchestration language |
The PowerDesigner generation system is extremely customizable through the use of extensions (see Customizing and Extending PowerDesigner).
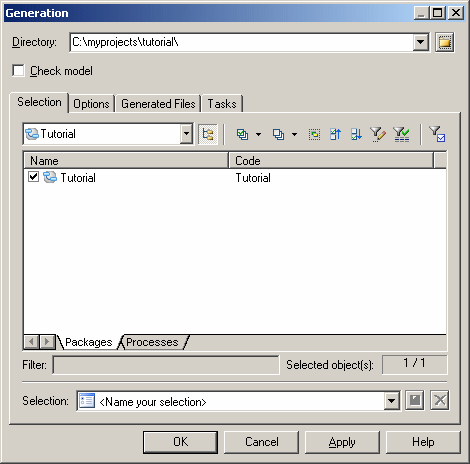
- Select to open the Generation dialog:
- Enter a directory in which to generate the files, and specify whether you want to perform a model check. For more information about checking your model, see Checking a BPM.
- [optional] Click the Selection tab and specify the objects that you want to generate from. By default, all objects are generated.
-
[optional] Click the Options tab and set any necessary generation options. For more information about these options, see the appropriate language chapter.
For information about editing the options that appear on this and the Tasks tab, see "Generation category" in Chapter 1, Resource Files and the Public Metamodel in Customizing and Extending PowerDesigner .
-
[optional] Click the Generated Files tab and specify which files will be generated. By default, all files are generated.
For information about customizing the files that will be generated, see "Templates and Generated Files" in Chapter 3, Extending Your Models with Profiles in Customizing and Extending PowerDesigner .
- [optional] Click the Tasks tab and specify any additional generation tasks to perform. For more information about these tasks, see the appropriate language chapter.
-
Click OK to begin generation.
A Progress box is displayed. The Result list displays the files that you can edit. The result is also displayed in the Generation tab of the Output window, located in the bottom part of the main window.
All files are generated in the destination directory.
Note:You can attach an extension file (.XEM) to your model to extend the generation process. For more information, see "Extensions" in Chapter 1, Resource Files and the Public Metamodel in Customizing and Extending PowerDesigner .
