Log in using an account with DBA privileges.
Start Sybase Central,
To start Sybase Central on UNIX, type:
% cd $SYBASE/sybcentral
% scjview
To start Sybase Central on Windows, run Sybase > Adaptive Server IQ 12.6 > Sybase Central Java Edition from the Programs menu.
In the left pane of Sybase Central, select Sybase IQ.
On the Utilities tab, double-click Start Server.
Click Next. Starting a single server is the default.
The information that you specify on the Connection Parameters screen is used each time you start the database.
Connection profiles store parameters to help you connect faster. If a Connection Profile exists, choose it from the dropdown, and click Next.
If no Connection Profile exists for the server, supply connection parameters in the appropriate text boxes. (The wizard creates a Connection Profile from these parameters if you request it on the summary screen.) To change default information, simply select it and type over it. In general, the default User ID and password are sufficient; changing the User ID from DBA to another user limits functionality.
Always change the default port number for each server to a different number that is not in use.
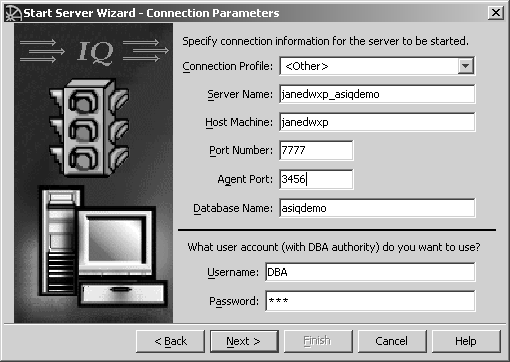
After supplying parameters, click Next.
On the Database Path screen, type the database name and path, or use the Browse key to choose a database on the local host.
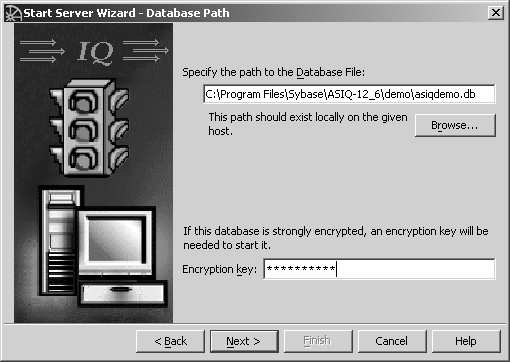
If the database is encrypted, type the encryption key in the box.
Click Next. The Summary screen lists the settings you specified. Server options listed below the line are highlighted if selected, dimmed if not. Click the checkbox to create a connection profile that specifies the parameters in the summary for future connections.
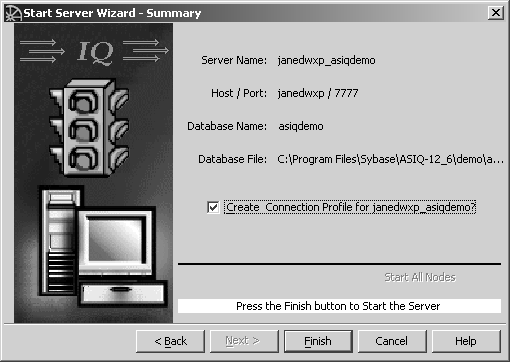
Click Finish if you are satisfied with options you specified. If not, click the Back button to change information.
![]() Starting all servers
in a multiplex
Starting all servers
in a multiplex
An IQ multiplex is a multiserver configuration that supports queries against a shared database from servers with a shared disk subsystem for a common IQ Store. You gain additional CPU power and memory space for processing queries by attaching more systems to the shared disk array.
Use Sybase Central to start multiplex servers interactively.
Log in using an account with DBA privileges.
Start Sybase Central,
To start Sybase Central on UNIX, type:
% cd $SYBASE/sybcentral
% scjview
To start Sybase Central on Windows, run Sybase > Adaptive Server IQ 12.6 > Sybase Central Java Edition from the Programs menu.
In the left pane of Sybase Central, select Sybase IQ.
On the Utilities tab, double-click Start Database Server.
Updates are made on only one server in a multiplex, the write server. Queries are usually submitted to all servers in the multiplex.
The wizard opens with starting a single server selected by default. Click the “All servers in multiplex” option button to start them all.
Click Next.
The wizard next displays a series of screens prompting you for server information. When starting all of the servers in a multiplex, supply information for the write server. Check all information carefully.
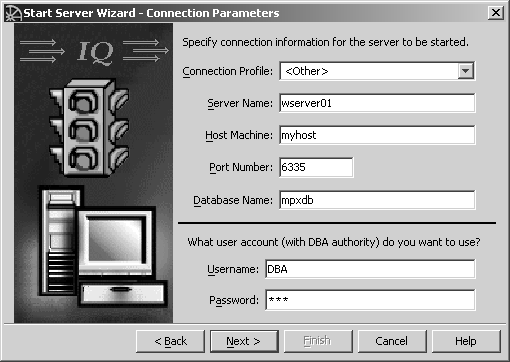
The information that you specify on this screen is used each time you start the database. To change default information, simply select it and type over it. In general, the default User ID and password are sufficient; changing the User ID from DBA to another user limits functionality.
Always change the default port number for each server to a different number that is not in use.
Click Next.
If the default IQ Agent port is already in use, the screen displays again with an additional text box where you must specify an IQ Agent port for this connection. If necessary, type an IQ Agent Port and click Next.
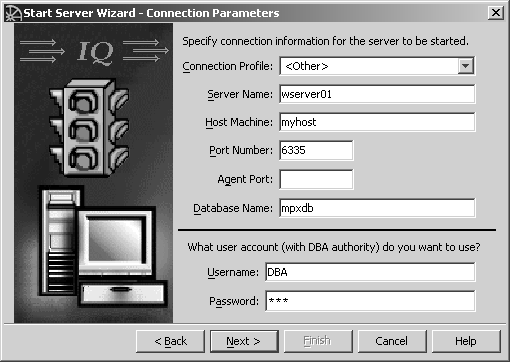
If the default IQ Agent Port is not in use, it is used for this connection.
Click Next.
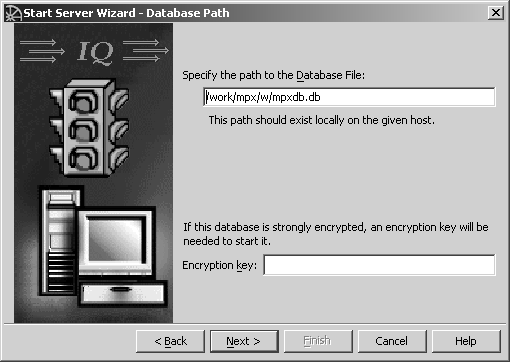
Specify the path to the database file on the write server. You may use the Browse button to locate the file. If there is an encryption key for the database, type it in the space provided.
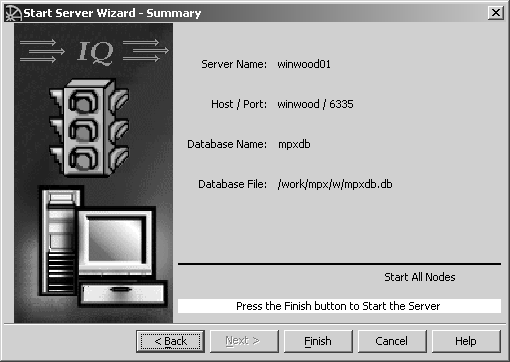
Click Next. The next screen summarizes startup settings. Options are listed below the line. They will be highlighted if selected, dimmed if not.
![]() Sybase Central uses the params.cfg file
to start the server, and requires that this file exist in the directory
where the IQ Catalog (.DB file) resides. You
may customize this file for each server.
Sybase Central uses the params.cfg file
to start the server, and requires that this file exist in the directory
where the IQ Catalog (.DB file) resides. You
may customize this file for each server.
Click Finish if you are satisfied with options you specified. If not, click the Back button to change information.