![]() To define styles for HTML element selectors:
To define styles for HTML element selectors:
Right-click an item in the left pane of a style sheet editor, then select Insert HTML Tag Selector from the pop-up menu. (See “Global Style Sheet editor restrictions”.)
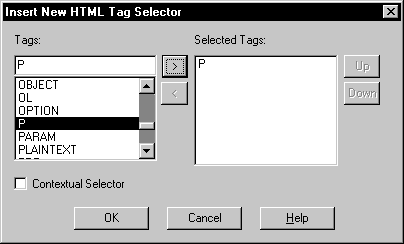
In the Insert New HTML Tag Selector dialog box, double-click the tag for which you want to define a style
or
Select the tag to be added to your style sheet and click the > button.
The selected tag is copied into the Selected Tag list box:

(Optional) Select the Contextual Selector check box and add another tag that you nest inside the first tag.
The styles you select are applied to the nested element only when it is nested below the element at the top of the Selected Tag list box. You can change positions of nested elements by selecting one of the elements in the list box and clicking the Up or Down buttons.
Click OK and select the new element in the left pane of the style sheet editor.
On the tab pages in the right pane of the style sheet editor, specify the type of style you want to add for the element by selecting or typing values for the style attributes.
After you finish setting the style definitions, you can insert another element in the external or embedded style sheet.