Inserting a directive

StepsTo insert a directive in a JSP page:

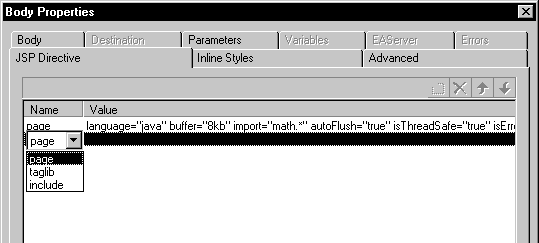
  1. Right-click inside a page in Page view and select Page Properties from the pop-up menu

    or

    Right-click inside the <BODY ...> tag in Source view and select Properties from the pop-up menu.

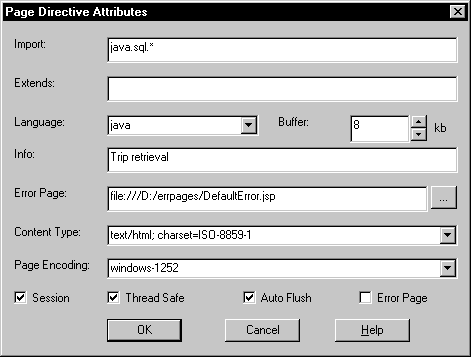
  2. In the Page Properties or Body Properties dialog box, select the JSP Directives tab and click the New icon.

  3. Select the type of directive you want to add in the drop-down list box in the Name column.

    Shown is the  JSP Directives tab of the Body Properties dialog box. It has columns for Name and Value with one current entry. A highlighted blank line below it shows where a new entry will be inserted. A drop down list box in the Name column displays three choices: page, tag lib, and include.
  4. Click inside the Value column, then click the Browse (...) button that displays at the right of the Value column.

    Complete the dialog box that displays.

    The type of dialog box that displays depends on the type of directive you are adding. The Page Directive Attributes dialog box looks like this:

    Shown is the Page Directive Attributes dialog box . From top to bottom, it displays a text field for Import with the entry java dot s q l dot *, a blank text box labeled Extends, a drop down labeled Language with java * selected, a Buffer spin control set to 8 k b, an Info text field with the entry Trip retrieval, an Error Page with a browse button displaying a file path, a Content Type drop down set to text / html ; char set = I SO 8 8 5 9 - 1, a Page Encoding drop down set to windows - 1 2 5 2, selected check boxes for Session, Thread Safe, and Auto Flush, and a cleared check box for Error Page.