The catalog contains predefined portlets that you can add to your Portal Interface pages. The catalog is organized by category and subcategory. The available pre-defined portlets are listed beneath the subcategory.
For example, there might be a category called “Local.” Click “Local” to see a list of subcategories, such as “weather,” “news,” and “real estate.” Click any of the subcategories to see a list of available portlets.
![]() Adding portlets from the catalog
Adding portlets from the catalog
Click Add Portlet from the toolbar.
In the Add Portlet window, click the category of interest. A list of available portlets appears beneath the main category.
Click the portlet you want to add to your page. You can add duplicate portlets to the page by clicking the portlet multiple times.
Click Done to close the Add Portlet window.
![]() Creating portlets from
the Web
Creating portlets from
the Web
Click Create Portlet from the toolbar.
In the Create Portlet, Step 1of 3 window, enter the URL of the Web site from which you want to get your portlet, and click Go.
WARNING! The content of many Web sites is protected by the Copyright Law of the United States, related laws contained in Title 17 of the United States Code, and international treaties. Failure to comply with the provisions of such law may result in the imposition of fines and/or damages. Each developer and user is responsible for compliance with applicable law in the use and reproduction of copyrighted content.
The Web site whose URL you entered appears in the Create Portlet – Step 1 of 3 window. Browse the site for the content you want to add to your page, and click Next, at the top right corner of the window.
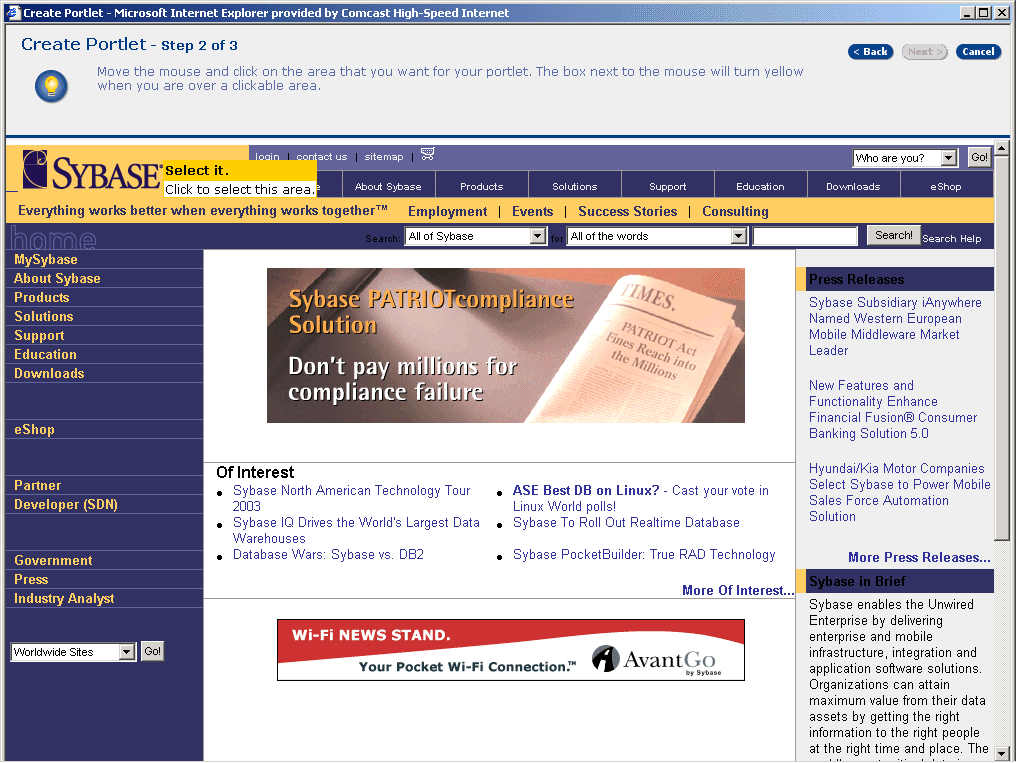
In the Create Portlet, Step 2 of 3 window, move the mouse around the Web site until you find the object you want to use in your new portlet.
This can be an image, a list, a table cell, or some other entity. Not all objects on a page are clickable because of the way a site constructs its pages. You can tell if an object is clickable by looking for the box next to your cursor to turn from orange to yellow.
When the box turns to yellow, left-click the object to select it.
Figure 4-1: Creating a portlet step 2

![]() When you create a portlet using one-click capture, and
the portlet content contains numerous links, some of the links may
not work properly due to underlying JavaScript or redirect code
in the link content.
When you create a portlet using one-click capture, and
the portlet content contains numerous links, some of the links may
not work properly due to underlying JavaScript or redirect code
in the link content.
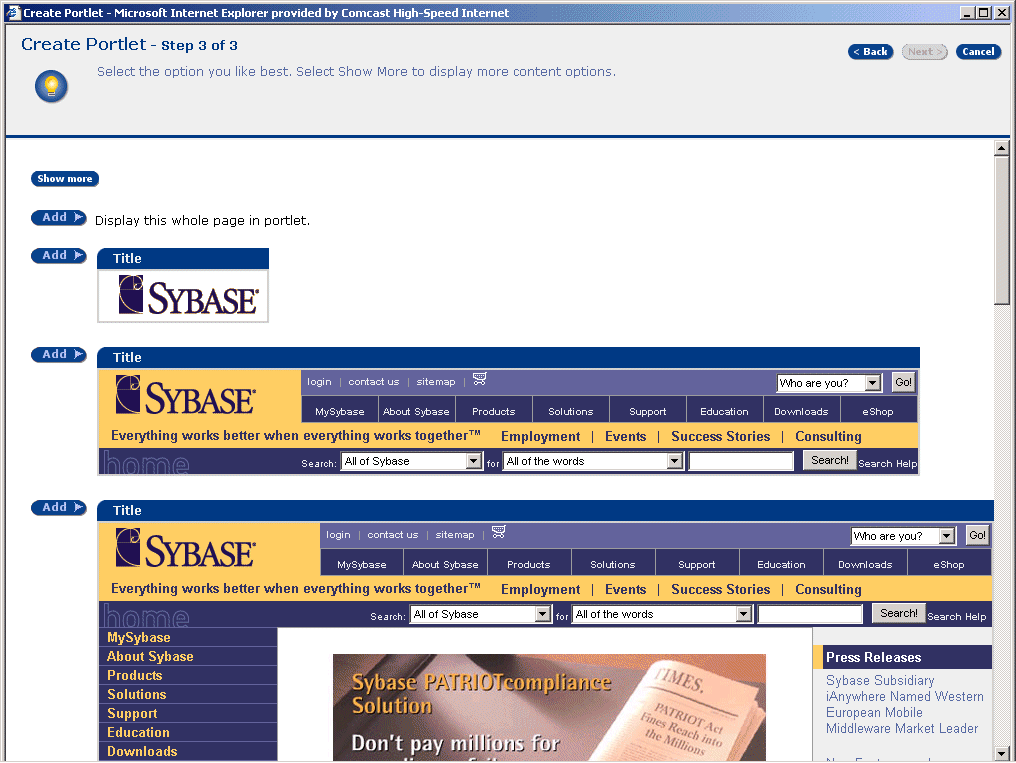
In the Create Portlet, Step 3 of 3 window, a preview window opens to show all objects that are nested within, and associated with, the selected object. Each one of these groups of objects is a window.
If the preview window contains more than one page of possible portlets, the Show More button appears. Click Show More to see the next page of portlets. As you look through the portlets, the Show Less button appears, so you can move back through the previously viewed pages of portlets.
Click Add, located to the left of the content you want to add to your page. You can add the entire page, or choose selected objects from the page.
Figure 4-2: Creating a portlet step 3

If you are adding a portlet from a secure site, you are prompted for your Portal Interface secure password. If you have not set one up, you can create one now.
When you add a secure portlet to a page, you are prompted for its secure password before the page displays.
![]() Do not add secure portlets to guest pages. To access
secure portlets, you must use HTTPS.
Do not add secure portlets to guest pages. To access
secure portlets, you must use HTTPS.