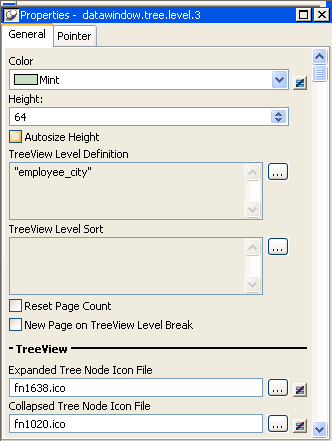
In the Properties view for a band, you can specify expanded and collapsed icons for each TreeView level. You access the Properties view by clicking the bar identifying the band for that level in the Design view in the report painter. You can also access the Properties view from the Rows menu, or by clicking any of the icons in the Design view that represent the locations of nodes, icons, and connecting lines. (See “Icons in the Design view”.)
![]() To modify properties for a level in a TreeView report:
To modify properties for a level in a TreeView report:
Select Rows>Edit TreeView Level from the menu bar and then select the number of the level from the list of levels, or click the bar identifying the band for that level or any of the icons in that band.
Use the report TreeView Level properties view that displays to edit the properties for the level you selected.

The properties that are specific to a TreeView level band are at the bottom of the Properties view:
Property |
Description |
|---|---|
Tree Node Icon File |
The file name of the tree node icon in a TreeView level band when it is in the expanded state. |
Collapsed Tree Node Icon File |
The file name of the tree node icon in a TreeView level band when it is in the collapsed state. |
You set the tree node icon file name separately for each TreeView level band. You can use a quoted expression for the tree node icon file.