![]()
![]()
![]()
![]()
In this lesson, you create a navigation rule to connect all the pages in the Web application.
Double-click the faces-config.xml file under the project folder MySybStore_Tutorials_Web/webroot/WEB-INF.
The file opens in the JSF Application Configuration Editor.
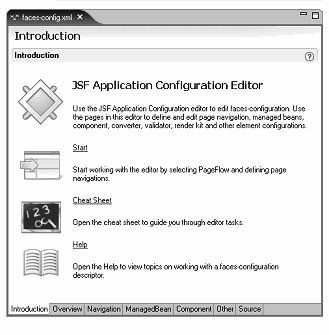
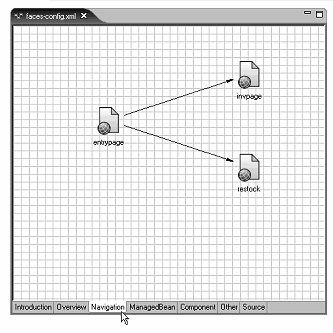
Select the Navigation tab to switch to the navigation editor.
To change the editor settings, select Window|Preferences from the main menu bar.
When the Preferences window opens, select Sybase, Inc.|Graphic Editors.
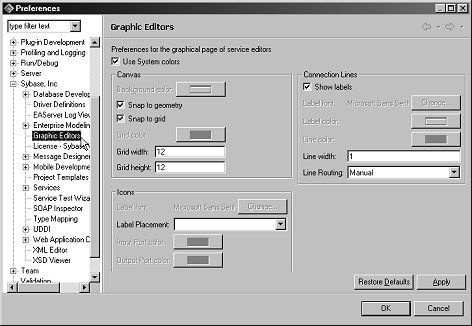
In the Icons section, select Bottom from the Label Placement drop-down list.
In the Connection Lines section, select the Show Labels option, select Manhattan from the Line Routing drop-down list, then click OK to apply the new preference settings.
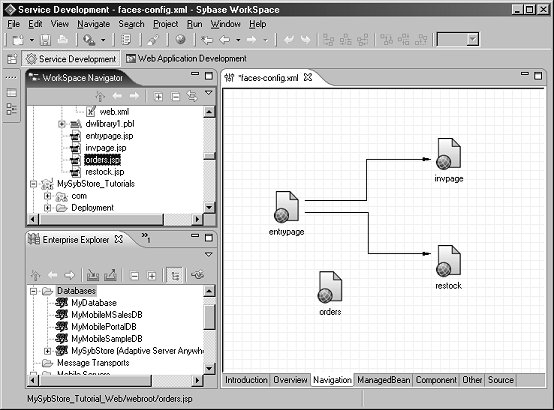
In the WorkSpace Navigator, go to MySybStore_Tutorials_Web/webroot/ and drag and drop the orders.jsp page onto the editor.
Select Window|Show View|Palette on the main menu n bar to open the palette.
![]() If you do not see Palette on
the list, click Other. When the Show
View dialog box opens, select Basic|Palette and
click OK.
If you do not see Palette on
the list, click Other. When the Show
View dialog box opens, select Basic|Palette and
click OK.
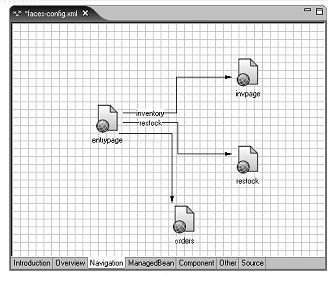
Select Link from the Palette to activate the Link control, which allows you to draw lines to link pages to indicate the page flow.
Click the entrypage icon, move the cursor to the orders icon, and click again to release the cursor..
A line with an arrow appears connecting the two pages. The arrow points to the orders page to indicate the navigation flow.
Reselect the Palette by either clicking the Palette icon in the Fast View shortcut bar or right-clicking in the editor and selecting Show View|Palette. Click the Select control to deactivate the Link control.
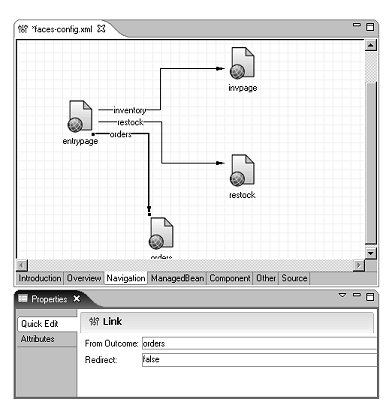
Create the label for the link line:
Right-click in the editor and select Show View|Properties from the context menu.
Select the orders link line in the diagram.
In the Properties view,
type orders in the From
Outcome field in the Quick Edit Links section.
The word orders displays
over the link line that connects the entrypage to
the orders page.
In the Properties view, select the Attributes tab.
Set the From-Outcome property of each link to set the link result for each page:
Select the orders link line in the editor.
In the Properties view, select the From-Outcome property, then click the ellipsis button (3 dots) on the far right of the Value field.
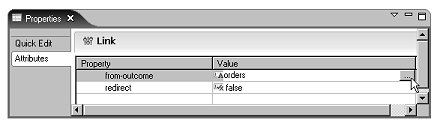
When the Outcome Selection dialog box opens, select the Component ID for the Orders action and click OK.

Repeat steps a – c to set the From Outcome property for the other two links.
Select File|Save from the main menu bar to save your changes.
To test the page, restart Unwired Orchestrator, right-click entrypage.jsp, and select Run from the context menu.
When the entrypage.jsp is loaded, click each link to load the inventory, restock, and orders pages.
You have created the navigation to connect the inventory, restock, and orders Web pages.
