![]() Generating a map
Generating a map
Choose Build>Generate Map from the main menu.

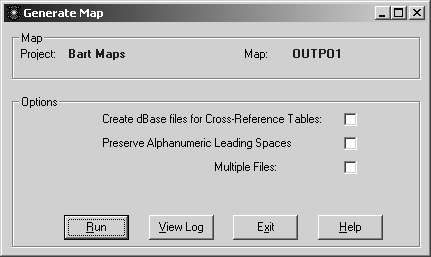
The Generate Map window displays. The names of the current Project and Map display in the Map section at the top of the window.
Select any of the following options, if applicable to your map:
Create dBase files for Cross-Reference Tables – Select this option to have the program create a copy of each cross-reference table in a .dbf file. The default is not to create the dBase tables, but to save them in the map file.
Preserve Alphanumeric Leading Spaces – Select this option to preserve all leading spaces for your alphanumeric fields.
Multiple Files – Select this option if you checked this option on the Outbound Map Flow window. This option is only available for outbound and any-to-any maps. (See Chapter 15, “Creating a Map Flow” for information about the Multiple Files option.)
Select Run on the Generate Map window.
If the map was generated successfully, a Map
Generation Completed Successfully message displays.
If the map did not generate successfully, a No
Map Generated. All Errors Need To Be Corrected. message
displays.
Select View Log on the Generate Map window to see the actions that took place during map generation and any error conditions that were found.
Carefully review all the Warnings, “Not Referenced” messages, and Errors that were encountered during map generation. As mentioned earlier, warnings and messages do not prevent your map from being generated, but they should be looked at. Errors must be corrected. Once you have corrected all Errors and serious Warnings and “Not Referenced” messages, generate your map again.
Once your map has generated successfully, Select Exit.