This section describes how to add a user to a database.
![]() Adding a user to the sample database
Adding a user to the sample database
Create users in order to add permissions to database objects.
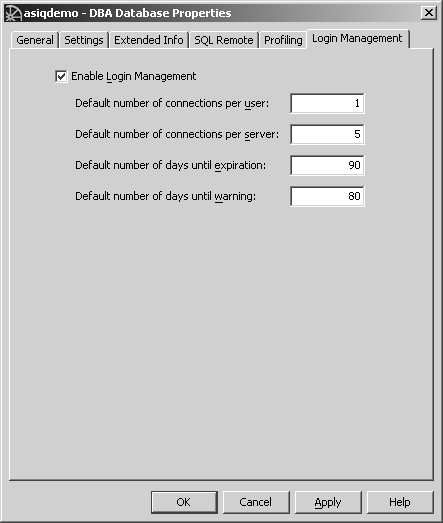
For Sybase IQ Login Management functionality, right-click the database and choose Properties from the submenu. If you do not wish to manage logins for this user, skip to Step 4.
Choose the Login Management tab. Click “Enable Login Management” or Alt+L.
Type the values for settings. For this tutorial, set 1 connection per user, 5 total database connections, 90 days until expiration, and 80 days until warning. Click Apply.

Select the Users & Groups folder in the left panel. You may need to expand the sample database container in the left panel to do this.
Click New User  toolbar
button, or choose Alt+F, N, U.
Type the name Sandy in the text box and click Next. This is the user ID for the new user.
Check “Allow this user to connect” and type a password. Alt+C or tab to the Confirm box, and retype the password. For example, you could use the password “beach”.
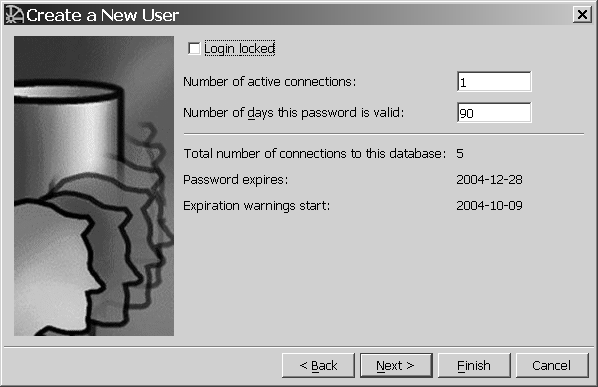
If you have enabled Sybase IQ Login Management, the login management screen appears.
On a non-multiplex server, the screen is similar to the following. You can select Login locked to lock this user out of the database, if desired. You can also modify the number of active connections and days the password is valid. The remaining limits are set on the database (see Step 3).

On a multiplex server, the lower half of the screen displays server-specific data: the names of write and query servers, the maximum connections for each, and whether the user is locked out of that server. Values set by the user in the upper portion of the form reflect immediately in the lower portion. Server-specific values default to zero connections (no restriction) and not locked out.
Click Next. The authorities screen displays. To select the authority desired for the new user, check the option or apply the shortcut key combination from the following list:
DBA (Alt+D) — Can fully administer the database
Resource (Alt+R) — Can create database objects
Remote (Alt+m) — Required by SQL Remote
For this tutorial, grant DBA authority.
Click Next. Type “Sales dept. intern” in the Comment box.
Click Finish to create the new user.